The Ultimate Guide to Balcony Flooring: Best Materials for Renters
Hook renters who hate their bare concrete balcony floor. Promise easy, non-permanent solutions that won't cost their security deposit.
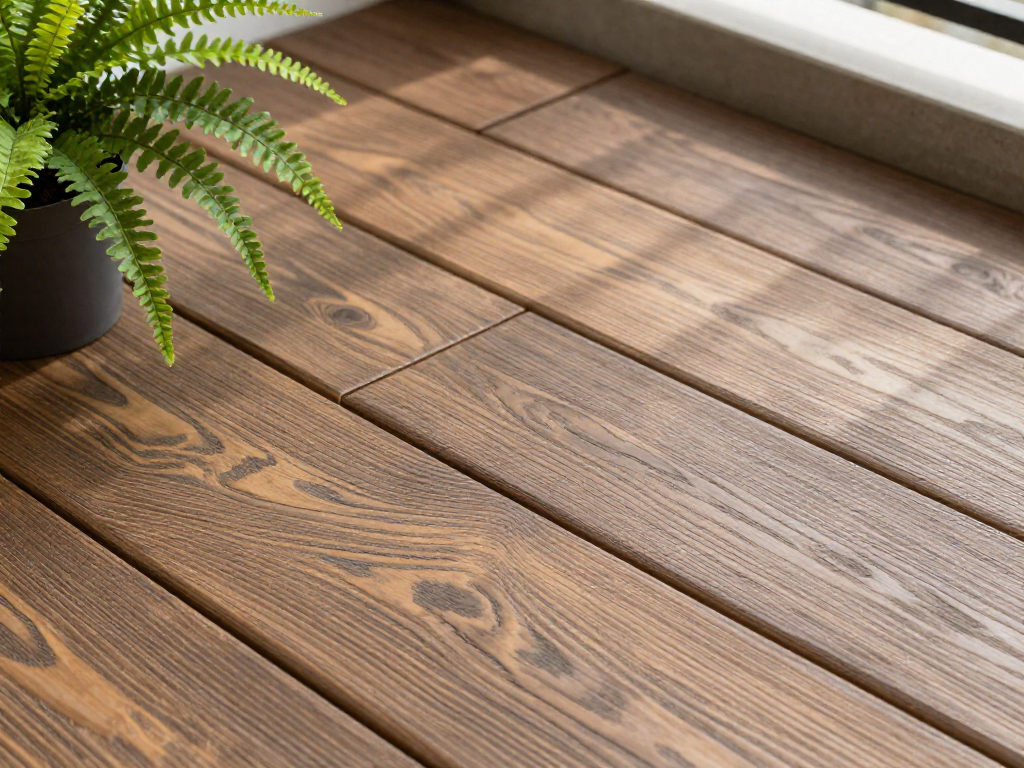
Why Renter-Friendly Flooring Matters
Many apartment balconies start with bare concrete floors—stained, cracked, or just plain uninspiring. That cold, gray surface can make even the sunniest spot feel unwelcoming. And as a renter, you're likely bound by lease terms that forbid permanent alterations. Nailing down tile, gluing carpet, or painting the floor might cost you your security deposit.
But here's the good news: temporary flooring options exist that won't damage the original surface and come up cleanly when it's time to move. They're designed to be placed over the existing floor without adhesives or fasteners. So you can roll out a warm wood-look deck, snap together weather-resistant tiles, or cushion the space with interlocking foam mats—all without breaking your lease. The result is an instant balcony glow-up that feels more like an outdoor room, perfect for morning coffee or evening relaxation. No heavy labor, no permanent marks, just a space you'll love spending time in.
Top 5 Temporary Balcony Flooring Materials
Choosing a temporary floor for your balcony can completely transform the space—and it’s easier than you think. Here are our top five renter-friendly picks, each with a quick look at the upsides and potential drawbacks.
Interlocking Wood or Composite Deck Tiles
These snap-together tiles create the look of a real wood deck without nails or glue. Composite versions resist moisture and fading better than natural wood, making them a smart choice for exposed balconies.
- Pros: Instant snap-together installation; realistic wood appearance; durable and weather-resistant (especially composite).
- Cons: Higher upfront cost; may trap water underneath if not slightly elevated; some composites can fade with prolonged sun exposure.
Artificial Grass Rolls
Nothing brings a fresh, green vibe to a balcony quite like artificial grass. It comes in rolls that you simply cut to size and lay flat—no tools needed.
- Pros: Soft underfoot and safe for pets; instant low-maintenance greenery; trims easily with scissors.
- Cons: Can become uncomfortably hot in direct sun; needs occasional rinsing to stay clean; drainage may be slow if the backing doesn’t have holes.
Rubber or PVC Roll-Out Mats
Often sold as interlocking puzzle pieces or continuous rolls, these offer a cushioned, slip-resistant surface that’s great for high-traffic spots.
- Pros: Comfortable and gentle on joints; easy to cut for custom sizing; slip-resistant even when wet.
- Cons: May have a temporary rubbery smell; can discolor over time from UV exposure; the industrial look doesn’t suit every style.
Peel-and-Stick Carpet Tiles
Indoor/outdoor carpet tiles bring warmth and color with minimal effort. Just peel the backing and press them onto a clean, flat surface.
- Pros: Truly DIY-friendly; soft and cozy underfoot; replace individual tiles if they get stained or damaged.
- Cons: Adhesive could leave residue—opt for low-tack or removable tiles; not all are fully waterproof; may trap dust and allergens.
Outdoor Rugs Made for Balconies
Woven polypropylene rugs designed for outdoor use are an affordable, instant style upgrade. They come in endless patterns and sizes to fit your balcony.
- Pros: Budget-friendly and widely available; adds instant color and personality; easy to roll up and take with you when moving.
- Cons: Can flap or blow away in strong winds—use a rug pad or gripper; colors will fade over time; less durable in extreme weather without protection.
How to Install Interlocking Deck Tiles in 4 Easy Steps
Installing interlocking deck tiles is a renter-friendly weekend project that transforms your balcony floor instantly. These snap-together tiles require no glue, nails, or permanent changes — perfect for apartments and condos. Follow these four simple steps to get a polished, durable surface you can enjoy all season long.
1. Measure and Plan Your Layout
Before opening a single box, measure your balcony’s length and width. Multiply the two to get the square footage, then add about 10% for cuts and waste. Most tiles come in 12x12 inch sizes, so you can quickly estimate how many packs you’ll need. Dry-lay a few tiles in different directions to see which pattern you prefer. A classic grid is straightforward, but a diagonal layout can make a narrow space feel larger. Mark a starting corner — ideally the straightest one or the edge you see when stepping out — and snap a chalk line to keep your first row aligned if needed.
2. Clean and Level the Surface
A smooth, debris-free base helps tiles sit flat and prevents clicking sounds when you walk. Sweep the balcony thoroughly and wash any stubborn dirt with mild soapy water. Let the floor dry completely. For concrete balconies, check for dips or cracks; if there’s a slight slope for drainage, that’s normal and the flexible tiles can handle it. If you find sharp bumps, lightly sand them down. For really uneven surfaces, consider a thin underlayment mat (like a picnic blanket or specialized foam underlay) to create a more forgiving base.
3. Snap Tiles Together Starting from One Corner
Begin in your chosen corner. Place the first tile with the interlocking tabs facing the walls. Take the next tile, align its tabs with the grooves of the first, and press down firmly until you hear a snap. Continue along the wall, building your first row. Then start the second row from the same side, connecting each tile to its neighbor and to the one above it. Work row by row until you reach the opposite edge. If tiles feel tight, wiggle them slightly or use a rubber mallet gently (a towel between helps prevent scratching). The pieces should lock snugly without forcing.
4. Cut Edge Tiles and Add Trim for a Finished Look
No balcony is a perfect rectangle, so you’ll almost certainly need to trim tiles along the final row or around odd corners. Mark the cut line with a pencil, then score firmly with a utility knife along the line several times. Snap the tile along the score or use a fine-tooth saw for wood-composite tiles. For small notches around door frames or pipes, a jigsaw or hacksaw works best. Always cut with the finished side up to avoid chipping. Slide the trimmed pieces into place; gaps up to ¼ inch are normal and can be covered with baseboard-style trim or quarter-round molding. Some tile systems offer matching edge ramps or end caps that clip on for a seamless transition. Finally, walk across the floor and adjust any loose connections. Add outdoor-safe adhesive to trim pieces if they don’t snap on. Your balcony floor is now ready for planters, furniture, and barefoot mornings.
Design Tips: Matching Flooring with Plants and Decor
Think of your balcony floor as the canvas that sets the tone for your entire outdoor nook. The key is to create a cohesive look where plants, pots, and decorative accents all feel like they belong together. Start by considering the color palette of your flooring. If you've chosen warm wood-look interlocking tiles, pair them with terracotta or ceramic planters in earthy tones—think rust, sage, or cream—to enhance that natural vibe. For cool gray stone composite tiles, crisp white or matte black pots create a sleek, modern contrast, while metallic or brightly glazed containers can add a playful pop of color.
Texture matters too. A smooth, polished tile floor calls for pots with rough finishes like unglazed clay or woven seagrass baskets to introduce tactile variety. Conversely, if your floor has a raised wood grain or pebble-like surface, go for smoother containers to keep the overall look balanced. Don't forget that plant choices themselves can echo the floor—a trailing ivy softening the edge of a wood plank, or spiky succulents complementing the sharp lines of geometric tiles.
One of the easiest ways to tie everything together is with a small outdoor rug. Layer an area rug over your temporary flooring to add pattern, define a seating zone, and make the space feel instantly cozier. Choose a rug with colors that echo both your floor and your planters—think a geometric print with hints of terracotta and gray, or a classic striped dhurrie in navy and white to anchor bright floral pillows. Rugs also hide any gaps or imperfections in snap-together tiles, and they feel great underfoot when you step out barefoot for morning coffee.
Lighting can dramatically change the mood and highlight your flooring's texture. Drape warm white string lights overhead or along the railing, and angle a small solar spotlight toward the floor. The low glow will emphasize the grain of wood tiles or the shimmer in composite stone, making the surface look magical after dark. If you have a rug with a bold pattern, the shadows from string lights can create an artful, dappled effect. For a truly dreamy evening setup, place a few flameless LED candles at varying heights around the floor perimeter—their soft light reflects off smooth tiles and gives the whole balcony a tranquil glow.
If your balcony has enough square footage, consider creating distinct zones with different flooring materials. This works especially well for long or L-shaped spaces. You might use interlocking deck tiles in a warm wood tone for the lounge area, then switch to a gray composite tile or a pebble mat for a little bistro dining spot—the visual boundary defines the functions without needing a physical barrier. To make the transition seamless, bridge the two materials with a row of potted plants or a narrow runner rug that picks up colors from both sides. This layered approach not only adds style but also makes a small balcony feel larger and more intentional.
Ultimately, the goal is to let your personal style shine while making the floor an integrated part of the scene—not just something you walk on. Snap a photo from above once you've arranged everything; that bird's-eye view will show you how well your rug, pots, and lights dance together. Share it, pin it, and enjoy the urban oasis you've created.
Maintenance Tips for Long-Lasting Temporary Floors
Keeping your temporary balcony floor looking fresh and damage-free is simple with a little regular care. A few minutes each week will extend its life and make sure it stays renter-friendly.
Start with a weekly sweep. Use a soft-bristle broom to remove dirt, leaves, and debris that can scratch surfaces or trap moisture. For interlocking deck tiles, a quick sweep is often enough, but for astroturf or grass tiles, a gentle shake or a leaf blower on low can lift trapped dust. Spot-clean spills right away with a damp cloth and mild soap to prevent stains.
Different materials need different love. Wood tiles, for example, benefit from a light coat of food-safe mineral oil every few months to prevent cracking and fading. Avoid harsh chemicals that can strip natural oils. Artificial grass tiles just need an occasional rinse with a hose or watering can to keep them fresh, and a brush to fluff up matted areas. For rubber or foam tiles, a simple wipe-down with a mild cleaner is usually enough.
Proper drainage is key to avoiding water damage. Before laying any floor, ensure your balcony has a slight slope for natural runoff. If water tends to pool, use tiles with built-in drainage channels or elevate the flooring slightly on a grid system. After rain or watering plants, check for standing water, especially near the edges, and sweep it away. This prevents mildew, warping, and slip hazards.
Extreme weather calls for a little extra attention. In areas with hot, direct sun, some materials may fade or become brittle over time. If possible, rotate tiles periodically to even out wear. During winter or prolonged wet seasons, consider taking up the tiles and storing them in a dry place. Most temporary floors are designed to be easy to remove, so stack them neatly and cover with a tarp to keep dirt out. Come spring, they'll be ready to shine again. A little seasonal care goes a long way in preserving the look and integrity of your balcony oasis.
FAQ
Can I install balcony flooring without damaging the original surface?
Yes, many temporary options like interlocking tiles, roll-out mats, or outdoor rugs sit directly on the existing floor without adhesives. They can be easily removed and leave no residue, making them ideal for renters. Just ensure the flooring material is compatible with the balcony surface to avoid scratches.
What is the easiest temporary flooring to remove?
Snap-together interlocking deck tiles are among the easiest to install and remove; they simply click into place over the existing surface and can be taken apart by hand. Roll-out wood or composite mats are also very simple—just unroll and later roll up to remove. Both options require no tools or adhesives and leave the original floor intact.
Are interlocking deck tiles safe for high-rise balconies?
Yes, interlocking deck tiles are generally safe for high-rise balconies when installed properly. They are lightweight, stay in place with a non-slip backing, and don't require permanent fasteners that could compromise the balcony membrane. Always check your lease and local building codes, and ensure the balcony can support the added weight of tiles and furniture.
How do I keep my balcony floor clean and prevent mold?
Regularly sweep or vacuum to remove debris, and occasionally mop with a mild soap solution. Choose antimicrobial materials like composite deck tiles or treat wood tiles with a waterproof sealant. Elevate tiles slightly to allow airflow and drainage, which prevents moisture buildup and mold growth beneath the flooring.
Can I use indoor carpet tiles on a covered balcony?
Yes, you can use carpet tiles on a covered balcony, but select outdoor-specific or all-weather tiles that resist moisture, UV, and mildew. Indoor carpet tiles may absorb dampness and grow mold if exposed to humidity or rain. On a fully covered, well-ventilated balcony, they can work as a cozy option, but ensure they are removable and don't trap moisture against the original floor.