5 Best Soil Mixes for Balcony Container Plants (DIY Recipes)
Why balcony plants need special soil mixes and how these 5 DIY recipes can transform your urban garden.
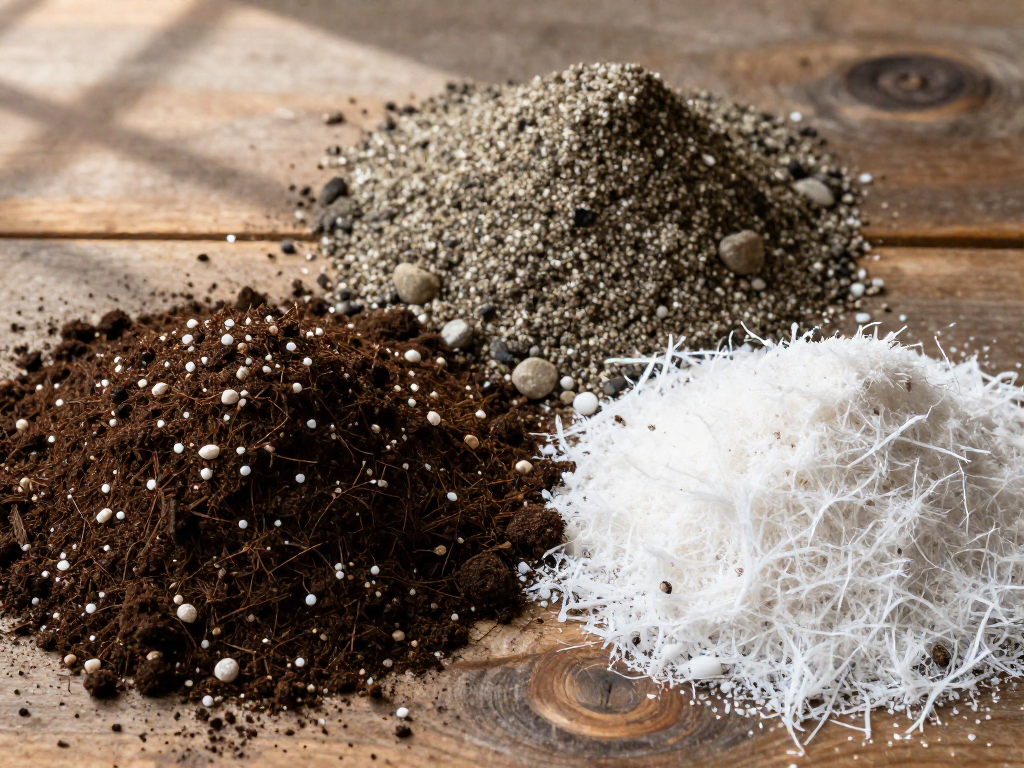
Why Soil Mix Matters for Balcony Containers
The soil you choose is the foundation of your balcony garden, and in a compact urban space, it plays an outsized role. Unlike in-ground gardening, containers restrict root growth and dry out faster, so the right mix can make the difference between thriving plants and constant disappointment.
Balcony containers demand a lightweight, well-draining soil. Heavy garden soil compacts easily, suffocating roots and adding unnecessary weight to your balcony—a critical consideration for structural safety. A dedicated potting mix, however, is designed to stay airy and promote drainage, preventing the waterlogged conditions that lead to root rot.
Your balcony’s microclimate also shapes your soil needs. Wind and sun can quickly evaporate moisture, so a good mix should hold onto water without becoming soggy. Ingredients like peat moss or coconut coir help retain moisture, while perlite or vermiculite keeps soil loose and breathable.
Store-bought potting mixes might seem convenient, but they often fall short. Many are peat-heavy and break down rapidly, losing structure by mid-season. They can also lack the right nutrient balance for long-term plant health. By crafting your own, you control freshness, texture, and fertility—tailoring the mix exactly to your plants and your balcony’s conditions. Think of it as a small investment that pays off in healthier, happier container plants.
Recipe 1: The All-Purpose Powerhouse Mix
If you're looking for a single soil mix that works beautifully across most of your balcony containers, this all-purpose powerhouse is the one to start with. It balances moisture retention, drainage, and nutrients to keep annuals and foliage plants thriving.
The recipe is simple: combine 2 parts coconut coir, 1 part perlite, and 1 part compost. Coconut coir holds moisture without getting soggy, perlite keeps the mix light and well-aerated, and compost provides a steady supply of nutrients. For an extra boost, add a slow-release fertilizer according to the package instructions—this will feed your plants gently over several weeks.
This mix is ideal for petunias, geraniums, ferns, and most common annual flowers. It creates a forgiving root environment that suits a wide range of plants, so you can use it across multiple pots without worrying about individual needs too much.
Pro tip: before adding compost, pass it through a simple screen (a piece of hardware cloth or an old colander works well) to remove any large, undecomposed chunks. This makes the final texture fine and uniform, ensuring young roots can spread easily and water penetrates evenly. Your plants will thank you with lush, healthy growth all season long.
Recipe 2: Succulent & Cactus Fast-Drain Mix
Succulents and cacti need soil that mimics their native gritty, low-nutrient environments. Standing moisture around their roots is a recipe for rot, especially on a balcony where humidity can get trapped. This mix drains freely, dries quickly, and gives them just enough to hold onto.
Ingredients: - 2 parts pumice or coarse sand - 1 part coconut coir - 1 part compost (optional)
Pumice is ideal because it's lightweight and porous, but coarse builder's sand works too. Coir provides a tiny bit of moisture retention without compacting, and the optional compost adds a gentle nutrient boost for soft succulents like echeveria. If you're growing desert cacti or lithops, leave the compost out entirely—these plants thrive in lean conditions.
Mixing it up: Combine the dry ingredients in a bucket until evenly distributed. If your coir came as a compressed brick, hydrate it first and then let it dry out a bit before measuring. The final texture should feel gritty and loose, not sticky.
Best for: Aloe, echeveria, sedums, haworthia, cacti of all kinds, and even caudex plants that need exceptional drainage.
Pro tip: Sprinkle a thin layer of gravel or crushed granite on top of the soil. This top dressing keeps the stem dry, suppresses fungus gnats, and gives your pots a polished, modern look. For plants that truly hate soggy feet, use a terracotta pot—it wicks away extra moisture. Water only when the soil is bone dry a finger's depth down, and your arid-loving friends will reward you with compact, healthy growth.
Recipe 3: Moisture-Locking Mix for Hanging Baskets
Hanging baskets add instant charm to any balcony, but they’re also the first to dry out—suspended in the air, they catch every breeze and soak up the sun from all sides. This moisture-locking mix is designed to keep thirsty plants happy for longer, reducing the need for constant watering.
Here’s what you’ll need:
- 2 parts peat moss or coconut coir: These fine-textured fibers hold many times their weight in water while still allowing roots to breathe. Coconut coir is a sustainable alternative to peat and comes in compressed bricks that expand when wet.
- 1 part vermiculite: This mineral flake expands when heated, creating tiny sponges that trap moisture and slowly release it back to plant roots. It also lightens the mix, preventing compaction.
- 1 part compost: Adds slow-release nutrients and beneficial microbes. Use finished, crumbly compost to avoid any big chunks that might block drainage.
- Water-absorbing crystals: Just a few teaspoons per gallon of mix can make a big difference. These polymer crystals swell into gel when soaked, acting like miniature water reservoirs for roots to tap into between waterings.
This blend is especially good for hanging basket classics like fuchsias, lobelia, trailing ivy, petunias, and any annuals that wilt dramatically the moment they get thirsty. The extra water-holding capacity means you won’t have to dash out with the watering can as often on hot afternoons.
Pro tip: Before you fill your baskets, pre-wet the entire mix thoroughly. Dampen it in a bucket or wheelbarrow until it’s moist all the way through—this activates the water crystals and ensures the peat or coir doesn’t repel water once it’s hanging. Fill your basket while the mix is still damp, then give it a gentle soak after planting to settle everything in. Your plants will start off with a fully hydrated root zone, and you’ll be amazed at how much longer the soil stays evenly moist.
Recipe 4: Organic Veggie & Herb Boost Mix
When your balcony garden includes edibles, you need a soil that feeds your plants as vigorously as you'll be harvesting them. This recipe is a nutrient-packed, organic foundation for vigorous growth and amazing flavor.
Start with equal parts compost, coconut coir, and perlite. Compost is the star here—it brings a wealth of beneficial microbes and slow-release nutrition. Coconut coir holds moisture without becoming soggy, and perlite keeps air moving so roots stay healthy. Then, stir in a generous handful of worm castings for a gentle, all-natural nitrogen boost, and a tablespoon of kelp meal per gallon of mix to supply trace minerals and growth-promoting hormones.
This blend is tailor-made for heavy feeders like tomatoes, peppers, basil, chives, and leafy greens. The rich organic matter supports steady leaf production and fruit set, even in the confined space of a balcony pot. For an extra edge, add crushed eggshells—an old gardener's trick. The calcium helps prevent blossom end rot in tomatoes and peppers, and it slowly releases as the shells break down. Just rinse, dry, and crush them into small pieces before mixing in. Your plants will repay you with a lush, productive season.
Recipe 5: Acid-Lovers’ Special Mix (e.g., Blueberries)
Some of the most rewarding balcony plants—think blueberries, azaleas, and camellias—thrive only when their soil is distinctly acidic. Standard potting mixes tend to be neutral or slightly alkaline, so crafting a custom blend is essential. This recipe creates a loose, moisture-retentive, and intentionally low-pH environment right in your container.
Ingredients
- 2 parts sphagnum peat moss
- 1 part pine bark fines
- 1 part perlite
- A handful of elemental sulfur or a dose of acidic fertilizer (follow label rates)
Peat moss is the star here, naturally lowering pH while holding moisture. Pine bark fines add structure and release mild acidity as they decompose. Perlite keeps the mix from compacting, ensuring roots get oxygen even during rainy spells. The sulfur or fertilizer gives an extra pH nudge downward and provides nutrients tailored for acid-lovers.
Best for
- Blueberries (a balcony favorite that demands pH 4.5–5.5)
- Azaleas and rhododendrons
- Camellias
- Hydrangeas (to encourage those vivid blue blooms)
Pro tip
Grab an inexpensive soil pH meter—analog or digital both work. After mixing, moisten the blend and test. Aim for 4.5–5.5. If it’s still too high, fold in extra peat moss and re-check. Remember that tap water can shift pH over time, so testing monthly keeps your acid-lovers beaming.
Mix thoroughly in a bucket or wheelbarrow before filling your pots. Top-dress with a little pine bark mulch to conserve moisture and slowly reinforce acidity. With this recipe, even a tiny balcony can host a mini blueberry bush or a stunning pot of blue hydrangeas—proof that with the right soil, any space can flourish.
How to Mix and Store Your DIY Soil
Once you’ve chosen your recipe, blending your own potting mix is surprisingly simple and oddly satisfying. Start by finding a comfortable workspace—ideally outdoors or in a well-ventilated area. A large, clean tarp or a sturdy plastic tub makes an ideal mixing vessel. Lay the tarp flat or place the tub on a steady surface, then pour in your ingredients according to the recipe. Use your hands (with gloves if preferred) or a small shovel to gently fold everything together. Work in a circular motion, lifting from the bottom, until the components are evenly distributed. You’ll know it’s ready when there are no obvious clumps or streaks of a single material.
A little trick to make the process less dusty and easier to handle: lightly moisten the mix as you blend. Keep a spray bottle filled with water handy and mist the surface while you turn the pile. You don’t want it wet—just damp enough to hold together briefly when squeezed. This cuts down on airborne particles and helps the ingredients bind without compacting. It also preps the mix for immediate use, though you can let it dry slightly before storing if you’re making a large batch.
Proper storage keeps your homemade soil fresh and ready for the next repotting session. Transfer any leftover mix into airtight bins—clear ones are great for spotting what’s inside at a glance. Choose a cool, dark spot away from direct sunlight, like a closet or under a shelf on your balcony. Sun and heat can degrade organic materials and encourage mold. Always label each container with the date you mixed it and the recipe type, using masking tape and a permanent marker. This simple habit prevents mystery mixes down the road and helps you remember which plants each blend was tailored for. Well-sealed, a DIY soil blend can stay viable for several months, though it’s best to use it within a season to enjoy peak texture and nutrient balance.
5 Common Container Soil Mistakes to Avoid
Even the best DIY soil recipe won't rescue your balcony plants if you stumble into a few classic pitfalls. I've made every one of these blunders myself, so let's spare your green babies the stress. Here are five common container soil mistakes, along with easy fixes.
1. Using garden soil straight from the ground. It's tempting to dig up some dirt from a nearby flowerbed, but garden soil is far too heavy for containers. It compacts quickly, strangling roots and preventing water from draining. On a balcony, the extra weight is also a concern for structural limits. Plus, you might introduce pests, weed seeds, or diseases that thrive in the cozy container environment. Always opt for a lightweight, soilless potting mix designed for containers.
2. Forgetting about drainage. No matter how fluffy your mix, if the pot lacks drainage holes, you're asking for root rot. Even a layer of pebbles at the bottom doesn't replace holes; it just creates a perched water table that suffocates roots. Whenever I repurpose a cute container, I drill a few holes if needed. Elevate pots on feet or a saucer with gravel so they never sit in standing water. In a rush? Simply use a plastic nursery pot inside the decorative one, and remove it for watering.
3. Overdoing the fertilizer. In the tight quarters of a container, synthetic slow-release pellets or too-frequent liquid feeding can burn roots quickly. Over-fertilized plants may show yellowing leaf edges or stunted growth. Remember, container soil has limited volume; excess nutrients can't wash away like in the ground. Diligently follow label rates, and consider using organic amendments that release nutrients slowly, like composted chicken manure pellets or worm castings.
4. Reusing old potting soil without a refresh. Last year's mix might look fine, but it's likely exhausted and could harbor pathogens. Reusing it as-is is a gamble. I always rejuvenate spent soil: either I empty it into a large tub, break up lumps, and mix in 30% fresh compost or coconut coir plus a sprinkle of slow-release organic fertilizer, or I pasteurize small batches in the oven at low heat (180°F for 30 minutes) to kill any lurking nasties before amending. Fresh, sterile mix is still the safest bet for edible plants.
5. Ignoring each plant's soil preferences. Succulents in a rich, moisture-retaining mix will quickly rot, while thirsty veggies in a fast-draining cactus blend will wilt daily. Match the blend to your plant: cacti and succulents need extra perlite or pumice; ferns and hanging baskets benefit from water-holding coconut coir; acid-lovers like blueberries crave a lower pH. When potting, I keep small labeled bins of amendments on my balcony shelf to tweak each batch.
Steering clear of these slip-ups means you'll spend less time nursing sad plants and more time enjoying your vibrant balcony oasis. A little attention to soil selection and pot prep goes a long way.
FAQ
Can I use regular garden soil in my balcony containers?
Regular garden soil is too dense for containers and can compact, reducing drainage and air flow. It may also introduce pests or weeds. Use a light, peat-based or coir-based potting mix formulated for containers.
How often should I replace the soil in my pots?
For balcony containers, refresh the soil every 1-2 years, or at the start of each growing season if you notice compaction or poor drainage. You can also top-dress with fresh compost annually to replenish nutrients.
Do I need to sterilize my DIY potting mix?
Not typically, if you use clean, quality ingredients stored in dry conditions. If you're worried about pathogens or pests, you can bake the mix at 180°F for 30 minutes, but for most balcony plants, it's not necessary.
What’s the difference between perlite and vermiculite?
Perlite is a white volcanic glass that improves drainage and aeration, and it doesn't hold much water. Vermiculite is a mineral that expands and retains moisture and nutrients, making it ideal for water-loving plants. Choose based on your plants' needs; many balcony mixes use perlite for drainage.
Can I mix these recipes in small batches for a few pots?
Absolutely, the recipes scale down easily. Use a ratio approach: for example, one part compost to one part perlite to two parts peat or coir. Mix in a bucket or wheelbarrow small enough for your balcony.
How do I know if my soil mix is draining properly?
After watering, water should flow out of the drainage holes within seconds, not pool on top. Test by pouring water slowly; if it puddles or takes forever, add more perlite. The top inch should dry between waterings.