Signs Your Brake Pads Need Replacing Before It's Dangerous
Notice a squeal when you brake? That's your scooter's brake pads crying for help. Discover the early warning signs to avoid costly repairs and stay safe on Malaysia's busy roads.
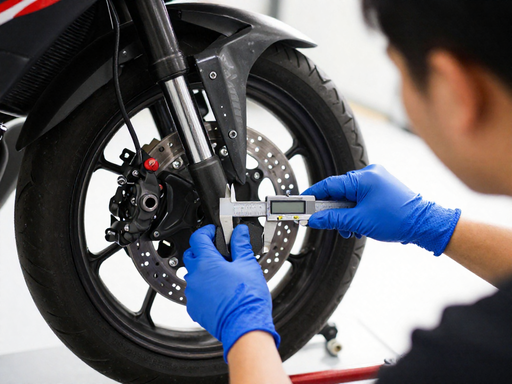
Common Warning Signs of Worn Brake Pads
One of the easiest ways to catch brake pad wear early is to listen for unusual sounds. A high-pitched squeal or screech when you apply the brakes often comes from a built-in wear indicator—a small metal tab that rubs against the rotor when the pad material is low. It’s designed to be annoying on purpose, so don’t ignore it. If the noise turns into a harsh grinding, metal-on-metal sound, your pads are likely gone, and the backing plate is now cutting into the rotor. That’s a serious safety risk and a costly repair.
You might also feel changes through the controls. Reduced braking responsiveness—where you have to pull the lever harder or step on the pedal longer to stop—means the pads are too thin to generate sufficient friction. In wet Malaysian traffic, even a slight delay can be dangerous. Vibration or pulsation at the brake lever or pedal often points to uneven pad wear, a warped rotor, or glazed pads from overheating. It’s not just uncomfortable; it compromises your ability to make smooth, controlled stops.
Finally, if your scooter or motorbike has a dashboard brake pad warning light, treat it as a clear signal to inspect the pads immediately. Not every model in Malaysia has this feature, so don’t rely on it alone. Combine these sensory checks with a regular visual inspection—through the caliper or wheel spokes—to spot pads that are thinner than a few millimetres. Catching these signs early keeps your ride safe and your repair bills small.
How to Visually Inspect Your Brake Pads
Before you start, park on level ground and let the brakes cool completely—touch the rotor gently with a fingertip to be sure. Once it's safe, kneel beside your bike and peer through the wheel spokes to locate the brake caliper. The brake pads are the friction material pressed against the metal rotor; you can usually see their edge from this angle.
First, estimate the remaining pad thickness. Many motorcyclists use a small ruler or a dedicated brake pad gauge. If the friction material is less than 3 mm thick, it's time to replace the pads—don't wait until you hear metal scraping. Next, look for uneven wear. Both pads on the same caliper should be worn down similarly; if one is thinner, the caliper might be sticking.
Inspect closely for cracks, crumbling edges, or a shiny, glassy surface (glazing). Glazed pads lose grip and should be replaced even if they look thick. Finally, run your finger lightly across the rotor face (again, make sure it's cool). If you feel deep grooves or scoring, the pads may have been contaminated or worn down too far, and the rotor itself might need attention.
Why Ignoring Brake Pad Wear Is Risky
Brake pads are your first line of defence when you need to stop quickly. In Malaysia’s busy city streets or sudden highway slowdowns, every metre matters. Worn pads increase stopping distance significantly, especially during emergency braking. That extra distance could be the difference between avoiding a collision and a serious accident.
Heavy traffic like the daily crawl on the LDP or MRR2 demands constant braking. When brake pads are too thin, they can overheat and fade, leading to a soft lever feel or even complete brake failure. You don’t want to discover that at a traffic light with cars all around you.
Neglecting brake pads also damages the brake rotors. Metal-on-metal grinding quickly scores the rotor surface, turning a simple pad replacement into an expensive rotor change. In some cases, the caliper pistons can overextend and leak, costing you hundreds of ringgit in repairs that could have been avoided.
Malaysia’s tropical downpours make braking even more critical. Wet rims reduce friction, and worn pads struggle to clear water from the rotor. The result? Even longer stops when you need grip the most. Carrying a pillion or groceries only adds to the risk, as extra weight means your brakes have to work harder.
Ultimately, riding with worn brake pads puts you, your passenger, and others in danger. It’s a preventable risk that can lead to crashes, injuries, and costly repair bills. Replace your pads when needed—your safety is worth far more than the price of a new set.
When to Replace Brake Pads: Beyond the Basics
In Malaysian city traffic, such as commuting through Kuala Lumpur or Penang, frequent stops at lights and in congestion accelerate brake pad wear. Brake pads typically last between 20,000 and 50,000 kilometres, but this range shrinks if you ride aggressively or often tackle off-road conditions. Hard braking and dusty trails eat through friction material faster, so inspect your pads more frequently after such rides.
Even if you ride little, brake pads age. Over time, the compound can harden or become glazed, reducing their ability to grip the rotor—even when there’s plenty of material left. That’s why skipping replacement based on time alone is risky. Always follow your bike manufacturer’s service intervals, which account for both distance and age. Regular checks, especially before long journeys, keep you safely ahead of wear.
DIY Brake Pad Replacement: Quick Steps for Malaysian Riders
If you’re comfortable with basic spanner work, replacing your own brake pads can be satisfying and save a trip to the workshop. Before you start, make sure you have the right tools: a socket wrench set, a C-clamp or piston tool, a fresh set of pads suited to your model, and some basic safety gear like gloves and eye protection. Park your bike on a level surface and let the brakes cool down completely.
Begin by loosening the caliper mounting bolts. On most scooters and kapchais, you’ll only need to remove two bolts to free the caliper from the fork leg or bracket. Slide the caliper off the brake disc, taking care not to strain the brake hose. The old pads will either fall out or need a gentle nudge—take a moment to note how the anti-rattle clips and shims sit.
Next, press the caliper piston back into its bore with the C-clamp, using an old pad to protect the piston face. This creates room for the thicker, new pads. Insert the new pads into the caliper bracket, making sure the friction material faces the disc. Refit any shims or springs you removed, then carefully align the caliper over the disc and torque the mounting bolts to your motorcycle’s specification.
Before you ride, pump the brake lever several times until it feels firm. This pushes the pads against the disc and restores proper lever feel. Test your work in a safe, empty area—ride slowly and apply the brakes gently at first. If the lever feels spongy or the brake grabs unevenly, stop and recheck your work.
Remember, while many disc brake systems are straightforward, bikes equipped with ABS or linked braking modules require extra care. If your scooter or motor has these systems, or if you’re unsure at any step, it’s wise to visit a trusted mechanic. Better to spend a little on professional service than risk your safety on the road.
FAQ
How often should I check my brake pads?
Inspect your brake pads every 2,000 to 3,000 km or at each scheduled service, whichever comes first. Frequent checks are especially important if you ride in heavy city traffic or hilly areas around Klang Valley. Look for the wear indicator groove and listen for any unusual sounds.
What is the minimum safe thickness for brake pads?
Most scooter and motorbike brake pads have a wear limit of around 1.5 to 2 mm of friction material remaining. Check your owner’s manual for the exact specification, as riding with thinner pads can damage the disc and drastically reduce stopping power.
Can I replace just one brake pad?
No, always replace brake pads in axle sets (both front or both rear) to ensure even braking. Using one new and one old pad can cause uneven pressure, pulling to one side, and premature wear of other brake components.
Why do my brakes squeak even after new pads?
New pads may squeak during the bedding-in period, but persistent noise often points to improper installation, lack of anti-squeal shims, or contamination. Ensure the mechanic cleaned the disc and applied brake grease correctly; if it continues, have the system checked for caliper misalignment.
How long do brake pads last in Malaysian weather?
In our tropical climate with frequent rain and stop-go traffic, brake pads typically last between 10,000 and 20,000 km. High humidity can accelerate disc rust and pad wear, so don’t ignore regular cleaning and maintenance to extend their life.